Fractal Ridge Slimline Mini ITX Case Review

Fractal looks to the past to go forward
Slightly over six months ago, when my review on the Fractal Pop line of enclosures was published, I made the comment that I had never actually had the opportunity to build a system in a Fractal Design case. That is certainly no longer true as the Ridge is the fourth new product from Fractal which I have reviewed in that time span. While the others were good products, the Ridge is certainly the most intriguing design.
Long ago, in the before times, desktop PCs were flat boxes with optical and floppy drives that sat beneath a monochromatic CRT monitor. Our esteemed EIC Sebastian Peak most likely has several of these stashed aside to bring out triumphantly in a dystopian, post nuclear winter world of the future. This design was not without some benefits, as it didn’t take up much desk real estate that wasn’t already going to be eaten up by the massive footprint of the CRT.
Of course, times changed and the PC enclosure evolved into the towers that we’ve all become more familiar with, but that dream of small enclosures that didn’t take up much desk space has stayed with us, but has really only been achievable in the last few years. Sure there were Lanbox systems utilizing Micro-ATX motherboards, but feature-laden ITX motherboards and quality SFX power supplies have made those systems seem huge in comparison.

Product Specifications
- Case dimensions: Vertical: 395 mm (H) x 110 mm (W) x 374 mm (D) / Horizontal: 115 mm (H) x 375 mm (W) x 360 mm (D)
- Volume: 12.6 liter
- Expansion slots: 3-slot
- Motherboard compatibility: Mini ITX
- Power supply type: SFX, SFX-L
- Dedicated 2.5″ drive mounts: 4x included, 4x positions total
- Fan Mounts:
- Total fan mounts: 2x 120/140 mm and 3x 80 mm
- Side fan: 2x 120/140 mm (2x PWM Aspect fan 140 mm included)
- Side radiator: 120 mm when ≤175mm long GPUs are installed (280 mm without GPU)
- Top fan: 3x 80 mm (not included)
- Component Clearance:
- CPU cooler max height: 70 mm
- GPU max length: 325 mm with SSD installed / 335 mm without SSD installed
- GPU max height: 125 mm with top fan(s) installed / 137 mm without top fans
- GPU max thickness: 57 mm with 2x 140 mm fans installed / 82 mm without side fans
- PSU max length: SFX-L
- Cable routing space: 13,8 mm (behind PSU)
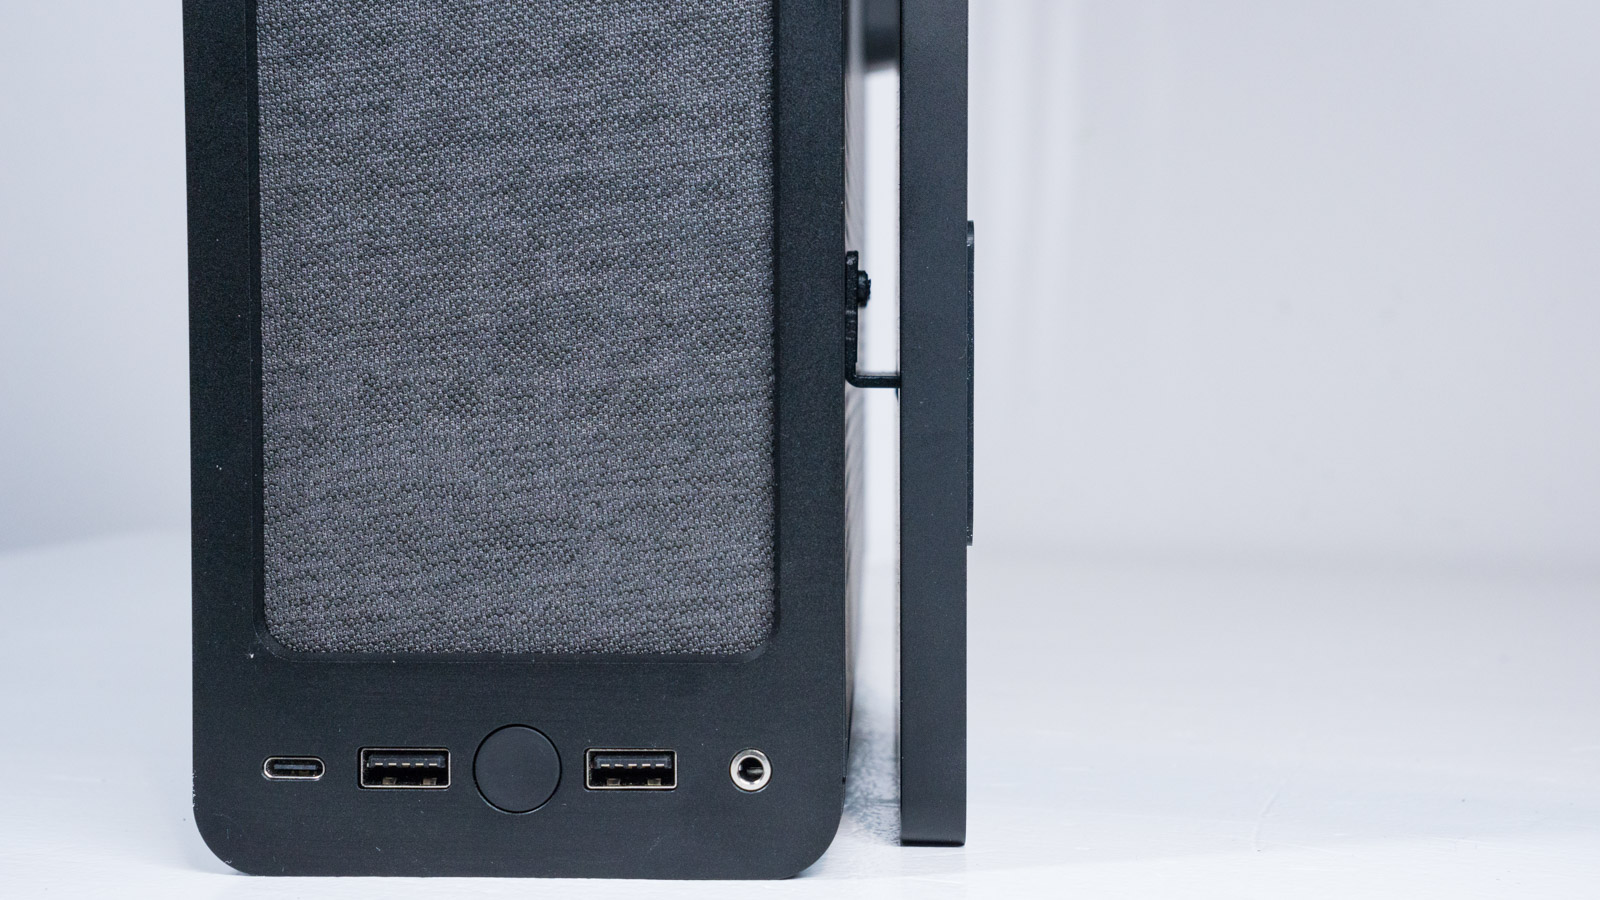
- Front interface: 1x USB 3.1 Gen 2 Type-C, 2x USB 3.0, 1x 3.5 mm audio/mic combo jack, power button, power LED
- Left/right side panel material: Steel, tool-less slide with captive thumbscrews
- Net weight: 4.3 kg
- SKUs: Black, FD-C-RID1N-01 / White, FD-C-RID1N-02
Pricing
$129.99 USD
Manufacturer Description
“An uncluttered, small form factor case designed to integrate seamlessly into your living space and daily rituals. An evolution of the slimline format, Ridge was developed in collaboration with gaming and entertainment enthusiasts to subtly improve their homes and enhance the small form factor PC experience.”
Case Overview
The new Ridge enclosure is a console style case that can be positioned either vertically or horizontally. Fractal really went out of their way to make the case as versatile as possible, and the manual details several different styles of systems that could be put in this very tiny enclosure, ranging from a simple HTPC, up to a very powerful gaming system.

Just a few years ago, a case this well made, in this form factor would only be coming from one of the boutique manufacturers and sell for over $200. Considering the build quality and design, the Ridge will be a steal at $129.99 if it performs.
I know many other reviewers often dwell on the packaging of cases, but I’ve never really felt that important unless the packaging and padding were of especially poor design. On the other hand, I’m going to make an exception here to congratulate Fractal for the use of recyclable cardboard padding instead of using non-degrading and difficult to recycle foam.


The included accessories are a bit misleading, as the box for them is huge, but this is mostly for the stand and the PCI-E 4.0 riser. There were only a handful of various screws, zip ties and Velcro ties. Sadly I do have to take a little bit away from Fractal’s eco-point total as each different screw type came in a separate plastic bag.
Beyond that, my first impressions of the Ridge were extremely positive. While it is a light enclosure (it is very small, and doesn’t have tempered glass) you can feel immediately feel that it is built with quality materials, and the fit and finish are absolutely top notch. The magnetically attached front panel has an attractive fabric design. When I first saw it, I thought this would be an area that was utilized for intake, but while it is open behind the fabric, it is not designed for the mounting of fans.


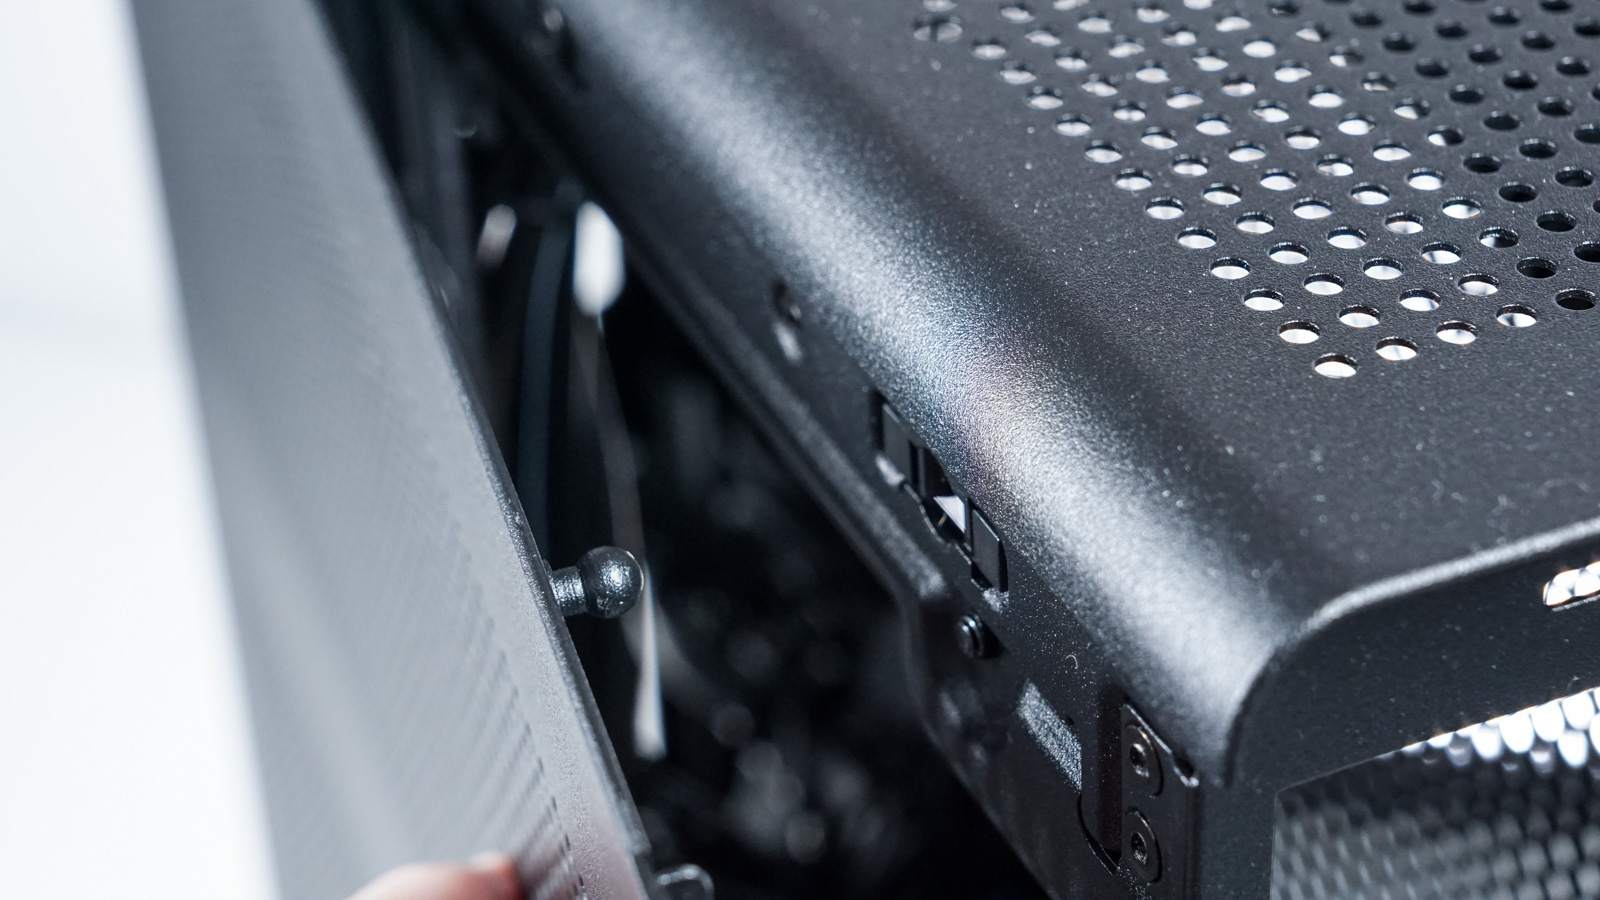
The Ridge does include two 140mm fans placed in the GPU compartment of the chassis. In stock configuration they are set up as intake, but I tested them as both intake and exhaust. If you’re using a GPU thicker than 2.5 slots, you will have to remove these fans. I did testing with and without. Fractal also designed the Ridge to accept three 80mm fans (not included) at the top edge of the GPU. These could be used as intake, but I really feel they would serve best as exhaust to aid in the heat from the GPU getting outside the chassis.


Building in the Ridge
The basic disassembly was pretty straightforward, but as I looked at the open enclosure I immediately realized that I wouldn’t be able to just throw a test system in, and decided to consult the excellent included manual. The Ridge requires a very specific order to be followed to correctly install system components, but the manual is very clear on what the order is, and even includes several building tips and optional steps if you encounter compatibility issues.
While you do have to follow the build order, it is not overly complex, and once you understand the way the Ridge is designed, it becomes pretty easy to work in. I tested the system in various configurations, and had no issues with opening it up and changing things around after going through the initial build process.
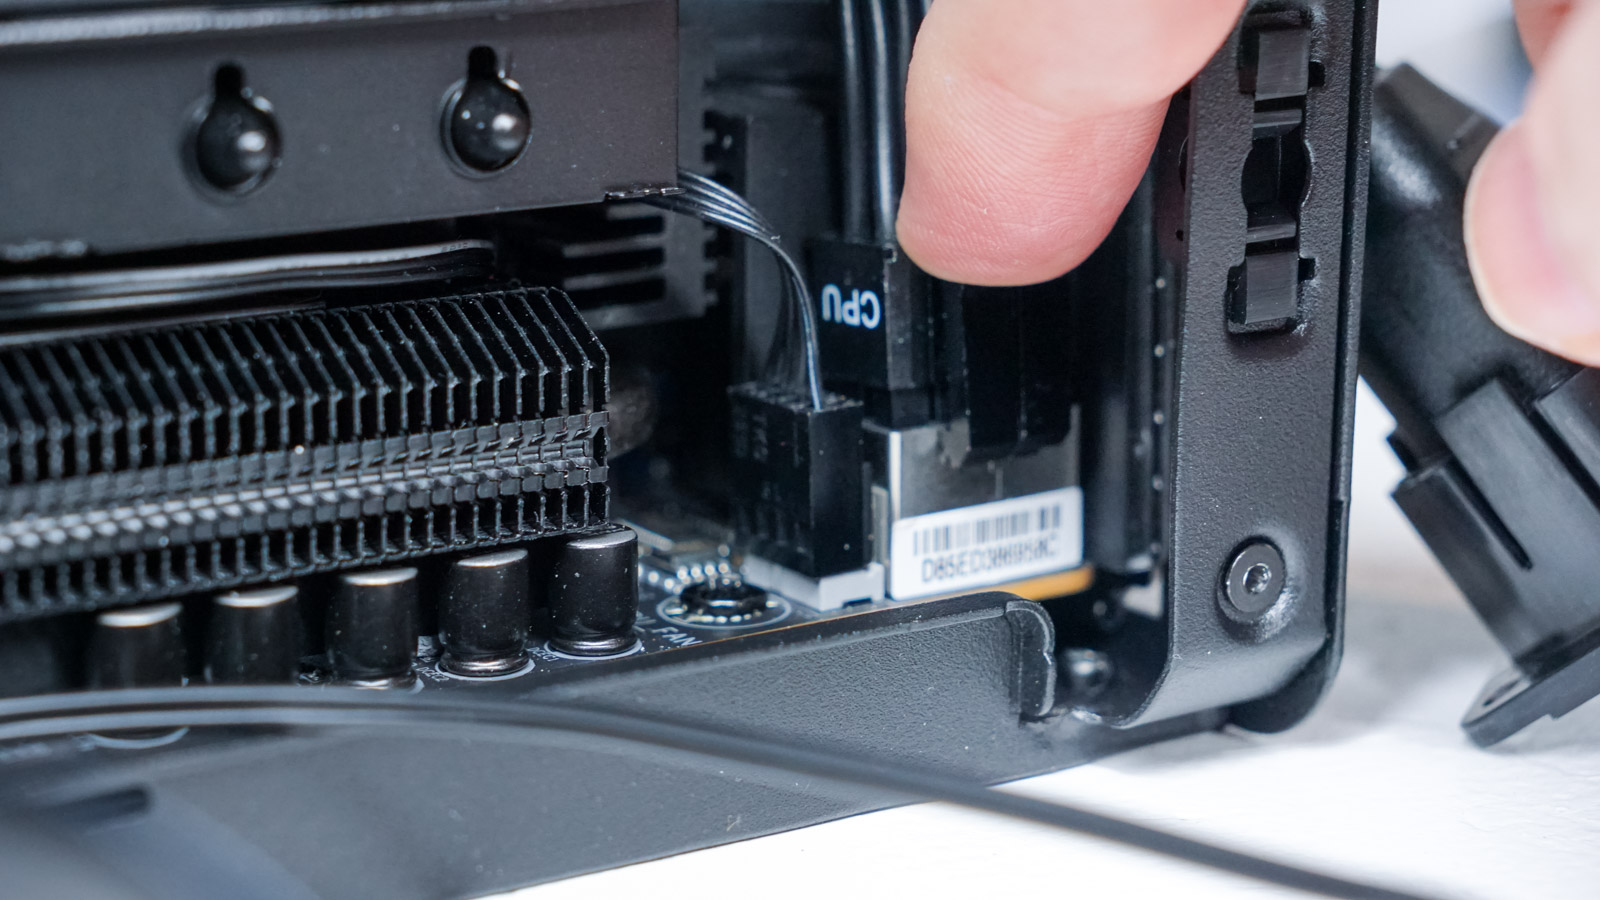
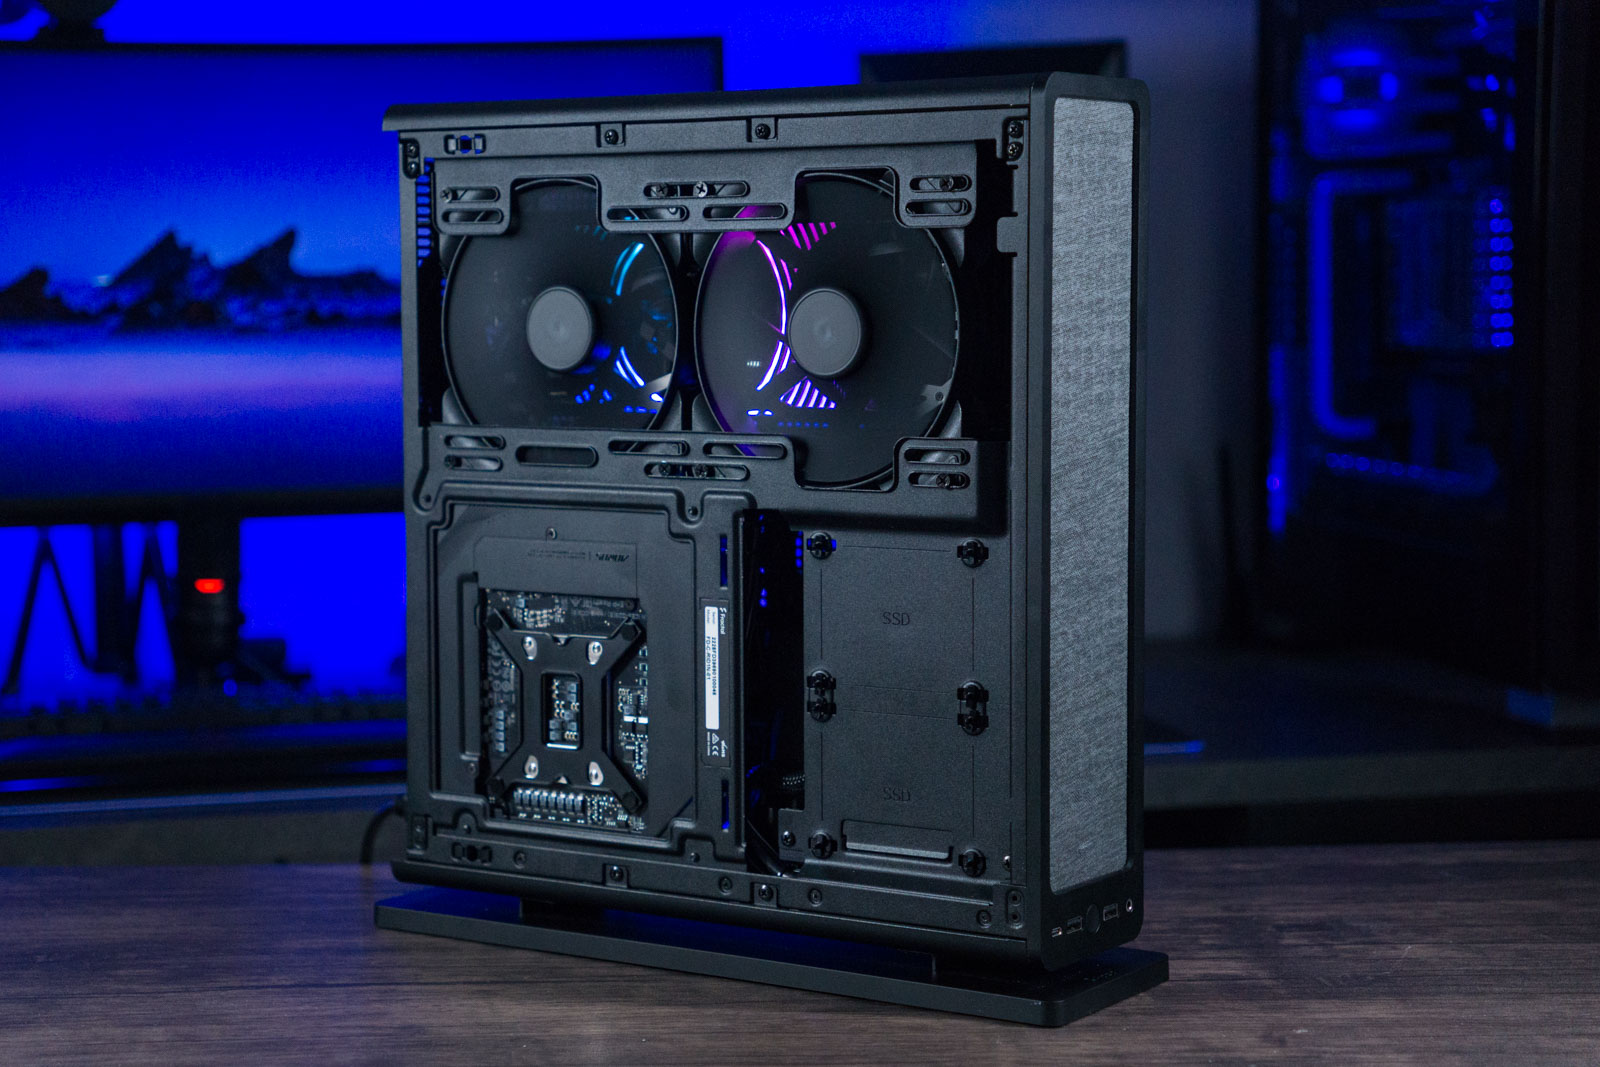
Considering that the Ridge is the smallest enclosure I’ve ever built in (11.6 liters), I was really surprised at how roomy it felt to work in. This is mainly because five of the six sides of the case feature removable panels that are mostly open underneath. In many ways it was like building in an open frame. Even the 8 pin CPU power plug was pretty easy to access.


Again I want to commend the excellent fit, finish, materials and quality control on the Ridge. Cases made of lesser materials or with poor quality control tend often need a little force applied to get things to line up. Problems like that are generally magnified on smaller cases, but I never once had an issue with the Ridge.
I really want to make a point at how small the Fractal Ridge really is. If you laid a Fractal Ridge on a table horizontally, it would have a slightly smaller footprint than the last case I reviewed (The Thermaltake Tower 500), but that case would be almost twenty inches (498mm) taller. I did feel that the front panel internal connector cables were a bit too long, but at least Fractal put a couple of zip tie points on the chassis between the motherboard and PSU, so these could be pretty easily bundled together and neatly tied up out of the way.


The power supply mounts to a bracket, connects to an external cord via an internal 90 degree cable. I did find that with the particular CPU cooler in the test system (ID Cooling IS-55) that the fan interfered with the cable attachment at the rear of the chassis. Again, Fractal had already thought of this and allowed the end of the cable to be detached. They even pointed this out as an optional step in the manual. This is probably a limited issue as the IS-55 is known to sit rather far up to the top of the motherboard, and has run into conflict on other ITX cases I’ve seen as well.
The PCI-E riser is a two part design, using PCB and not ribbon cable. The main portion of this is attached to the center support brace in the chassis. After the motherboard is installed and the brace is screwed back in, all that is left to complete the build is the second portion of the PCI-E card, and the GPU. Everything was completely pain free. By getting the motherboard and cooler set up outside the enclosure, then assembling everything by the instructions took under a half hour.


In regards to GPU compatibility, I had no issues fitting a standard width card (PNY XLR8 RTX 3080), and a wider than standard card (EVGA RTX 3070 Ti FTW3). With the wider card, you would not be able to use the space for the 80mm fans.


I also believe you might run into trouble if you were trying to use a GPU that requires the 12VHPWR connector due to how far they extend out from the side, and that all the cards which currently use that connector are extremely wide. I have to admit that if they could still be found, a full blower style GPU would be a perfect complement to the Ridge.
Completed Build


Performance Testing
As I mentioned previously, there are a few different types of systems that could be installed into the Ridge, but for testing I felt that a “worst case” gaming system would give us the best insight into the capabilities of this enclosure. The specs of my test rig reflect this, but I’ll explain my reasoning.
I went with the Intel Core i5-12600K as it is going to be a good representation of an up-to-date processor that is capable of high end gaming, but still able to be cooled adequately with a lower-profile cooler. You can install either a single fan or dual fan AIO, but only if you use a shortened GPU (single fan), or no GPU (double fan up to 280). I definitely wanted to put a powerful GPU in the system and test the Ridge in both its horizontal and vertical layouts.
I have to admit that I did a lot of testing on the Ridge enclosure, in a number of different configurations, more than I often do, and that is because I kept having this feeling that there was some missing performance opportunity. The Ridge is so well designed and built, and so easy to build in that I really wanted to be certain that I had left no stone unturned when checking the performance.
I have also never specifically done gaming tests before, but I feel that I probably should continue that trend going forward as it gives a much more accurate view of how enclosures will perform in what will, most likely, be their highest use scenario.
Specification of Test System:
- Intel Core i5-12600K CPU
- Gigabyte Aorus Z690i Ultra Lite Motherboard
- ID Cooling IS-55 Low Profile CPU cooler
- 16 GB (2x8GB) G.Skill Trident Z 3333 (@ 3600) memory
- PNY GeForce RTX 3080 12GB XLR8 OC, fan speed set to standard curve
All tests conducted at a controlled ambient temperature of 23.5° C. Motherboard Fan Curve set to “Performance”, Case Fans Set to 800 RPM.
- CPU Temperature Testing: Cinebench R23
- GPU Temperature Testing: Unigine Heaven set to Ultra Detail, Extreme Tessellation, and 8x Anti Aliasing at 1080p for 30 minutes
- Gaming Test: Gaming test performed for 30 minutes using Marvel’s Guardians of the Galaxy, 1920×1080, Ultra Settings with Ray Traced Lighting and Reflections on, DLSS set to Quality mode


One thing you won’t see in my testing, which is normally included, is sound testing. The main reason for that is that I discovered pretty quickly that the sound of the Ridge is going to be completely governed by the components you use. The case is so small, and so ventilated that there is nothing that isolates or dampens the sound from the component and the outside. With that being said, the two included 140mm fans will spin up to 1800 rpm and make a lot of noise at that speed. Personally I found that the best performance vs. noise on them was at 800 rpm and conducted the remainder of my testing at that speed.
I also encountered one other mystery of fluid dynamics with these fans and this case. If I positioned the fans as intake, obviously the GPU temperature was greatly improved as they are forcing air directly onto it, but my CPU temps were a bit high in CPU intensive tests. If I flipped the two 140s and positioned them as exhaust, my CPU temps dropped fairly substantially, but this also absolutely starved the GPU of air and it was unable to complete a single 30 min run of Unigine Heaven.
I also performed the same tests with the stock fans removed. The CPU temps were essentially the same as stock configuration during Cinebench, but the GPU was slightly worse. As you can see from the charts, I tried out numerous configurations on the Ridge during tests, and I’m happy to report that the Fractal Ridge can offer excellent performance. It can, but there are two problems that absolutely have to be overcome for it to reach its potential.
I have not mentioned it until now, as I really wanted to insure that I was clear on how good the quality of the chassis is before I hit on the two flaws I encountered, and before I go into them, I also want to emphasize that both can be overcome.
First, I feel like Fractal really dropped the ball on the design of the stand/foot included with the Ridge. If you use the case in a horizontal position, the foot absolutely chokes the intake for your PSU, and that’s the last thing you should do for an SFX power supply, or any power supply really. Using the Ridge horizontally with the included foot in place, the power supply fan would be screaming a banshee-like wail within a couple of minutes of any application using the GPU. In fact, I was never able to complete the thirty minute gaming test in this configuration.


What makes this worse is that even when used in the vertical configuration this stand restricts the hot air exhausting out of the PSU and causes the entire chamber for the PSU and motherboard to gradually build up heat, which also leads to more fan noise from the PSU. In this vertical configuration, the CPU and GPU temps were completely reasonable, but I did still have a good deal of fan noise from the power supply due to the restricted exhaust flow.
You can swap the side panel which the stand attaches to from the PSU side, to the GPU side, and then use the case vertically with the GPU at the bottom, which allows the PSU to breathe freely. I did notice a slight increase in overall system temps like this, as the heat from the GPU rises into the rest of the system, but the power supply fan was able to run at a much lower and quieter speed.
There just isn’t a large enough gap between this stand, and the panel to which it attaches. It really is the Achilles heel of the Fractal Ridge. Of course if Achilles had just worn some reinforced boots, the problem could have been solved. The same is true with the Fractal Ridge.
After seeing how much worse the performance was when positioned horizontally, I decided to remove the included feet and simply position the case on top of four stereo component feet. This allowed for a much larger area of airflow beneath the chassis, and improved performance dramatically in the gaming test (meaning that it could actually complete the 30 minute run).
This test was made with the case positioned as Fractal shows in the manual, with the PSU and CPU cooler fans facing downward. My thought was that even with the more open airflow allowed by using the four component feet; this still relied entirely on the PSU and CPU fans to pull air from beneath the chassis, so I tried one more experiment.
While still using the four component feet, I flipped the Ridge over, positioning the GPU intake at the bottom, and the CPU and PSU at the top. This was absolutely the right decision as the temperatures in this horizontal position actually bettered the vertical results with less noise and heat buildup. During all of this I also made some attempts at utilizing the space for the three 80mm fans, but they actually didn’t make a huge difference to the GPU, and had a negative impact on the CPU temps (some more of those strange fluid dynamics)
Conclusion
Reviewing the Fractal Ridge has been a bit of a trial. I may well be the best built enclosure I’ve yet reviewed, and on par with some of the best cases I’ve ever built in period. It has an attractive, very small design, and was incredibly easy to build in for such a small chassis. It does have some airflow issues that stem almost entirely from the design of the included stand/foot, but these can be overcome with a little creativity.

The Ridge with a set of $15 stereo component feet from Amazon
If it weren’t for the poor temperatures and blockage of the PSU airflow in the horizontal position, I would have given this case the Editor’s Choice. If I had not been able to come up with easy ways to get the temps and PSU fan under control, I wouldn’t have been able to recommend it. Luckily, you can easily get good air cooled temps out of a high end gaming PC in the Fractal Ridge and I’m happy to give it the PC Perspective Gold award.


Nice looking case, I could see using this in a high-end HTPC build. I do think it would look better with regular feet instead of the pedestal base in landscape mode but thats something that could probably be retrofitted.
Also, small ask for reviews like this it would be helpful to have something next to the case to get a idea of scale. Its always kinda hard to judge how big or small these non-typical form factor cases are without some context.
I have sent Sebastian a photo of the case with a set of stereo component feet that I picked up. He will be adding it to the review sometime over the next few days.
You are 100% correct. In previous small enclosure reviews I have always included a scale item in one of the photos, and I’ll be completely honest that doing so just completely slipped my mind while I was doing all the tests in the various configurations.
I didn’t even read far enough into the review to hear about heat problems or that you tried aftermarket feet when I posted my comment but yeah… Looks so much better that way, and I bet some cheap minimal rubber feet would work really well with the minimalistic Scandinavian aesthetic this case has going on.
Speaking of Scandinavian aesthetics I think some wooden (or metal) slats like what Fractal put on the North would be a good look for this case and would look right at home next to nice pre and power amp.
Nice review Kent. I’m interested in what you meant by “never able to complete the thirty minute gaming test”? Was it throttling or crashing?
In the gaming test, the application itself crashed, but the OS stayed active. It was not a display driver crash and the recorded temps for the GPU and CPU were both well under throttling. It was definitely the power supply temperature causing the efficiency to drop and no longer be able to provide enough power to the GPU. I would have considered that perhaps the PSU wasn’t enough (750 watts is the minimum recommended spec based on the other system hardware) but this never occurred in any other configuration, and I was able to run the gaming test for over an hour with no problems.
During the Heaven GPU stress test, the application failed once after 21 minutes when I tested the system fans as exhaust. This was a GPU throttling, then crashing issue as using the fans in this configuration completely starved the GPU of airflow.
So want to have a case like this that could somehow accommodate a single 3.5″ drive so that I could have a great storage option.
This is super helpful thanks. I’m doing the same build now and heard the banshee-wail PSU noise as well. So I ordered the same speaker feet and am going to try the inverted horizontal position like you recommend. Now I just need to figure out how to attach the feet because they didn’t come with nuts!